
I’ve gotta say – I’m a pretty lucky girl! Here’s why… My very best friend is my sister Jamie. We are 3.5 years apart, and although we’ve had our share of sibling rivalry, she will always be my best friend. To celebrate our friendship, I thought I would make her this special photo gift and give it to her along with a friendship card.
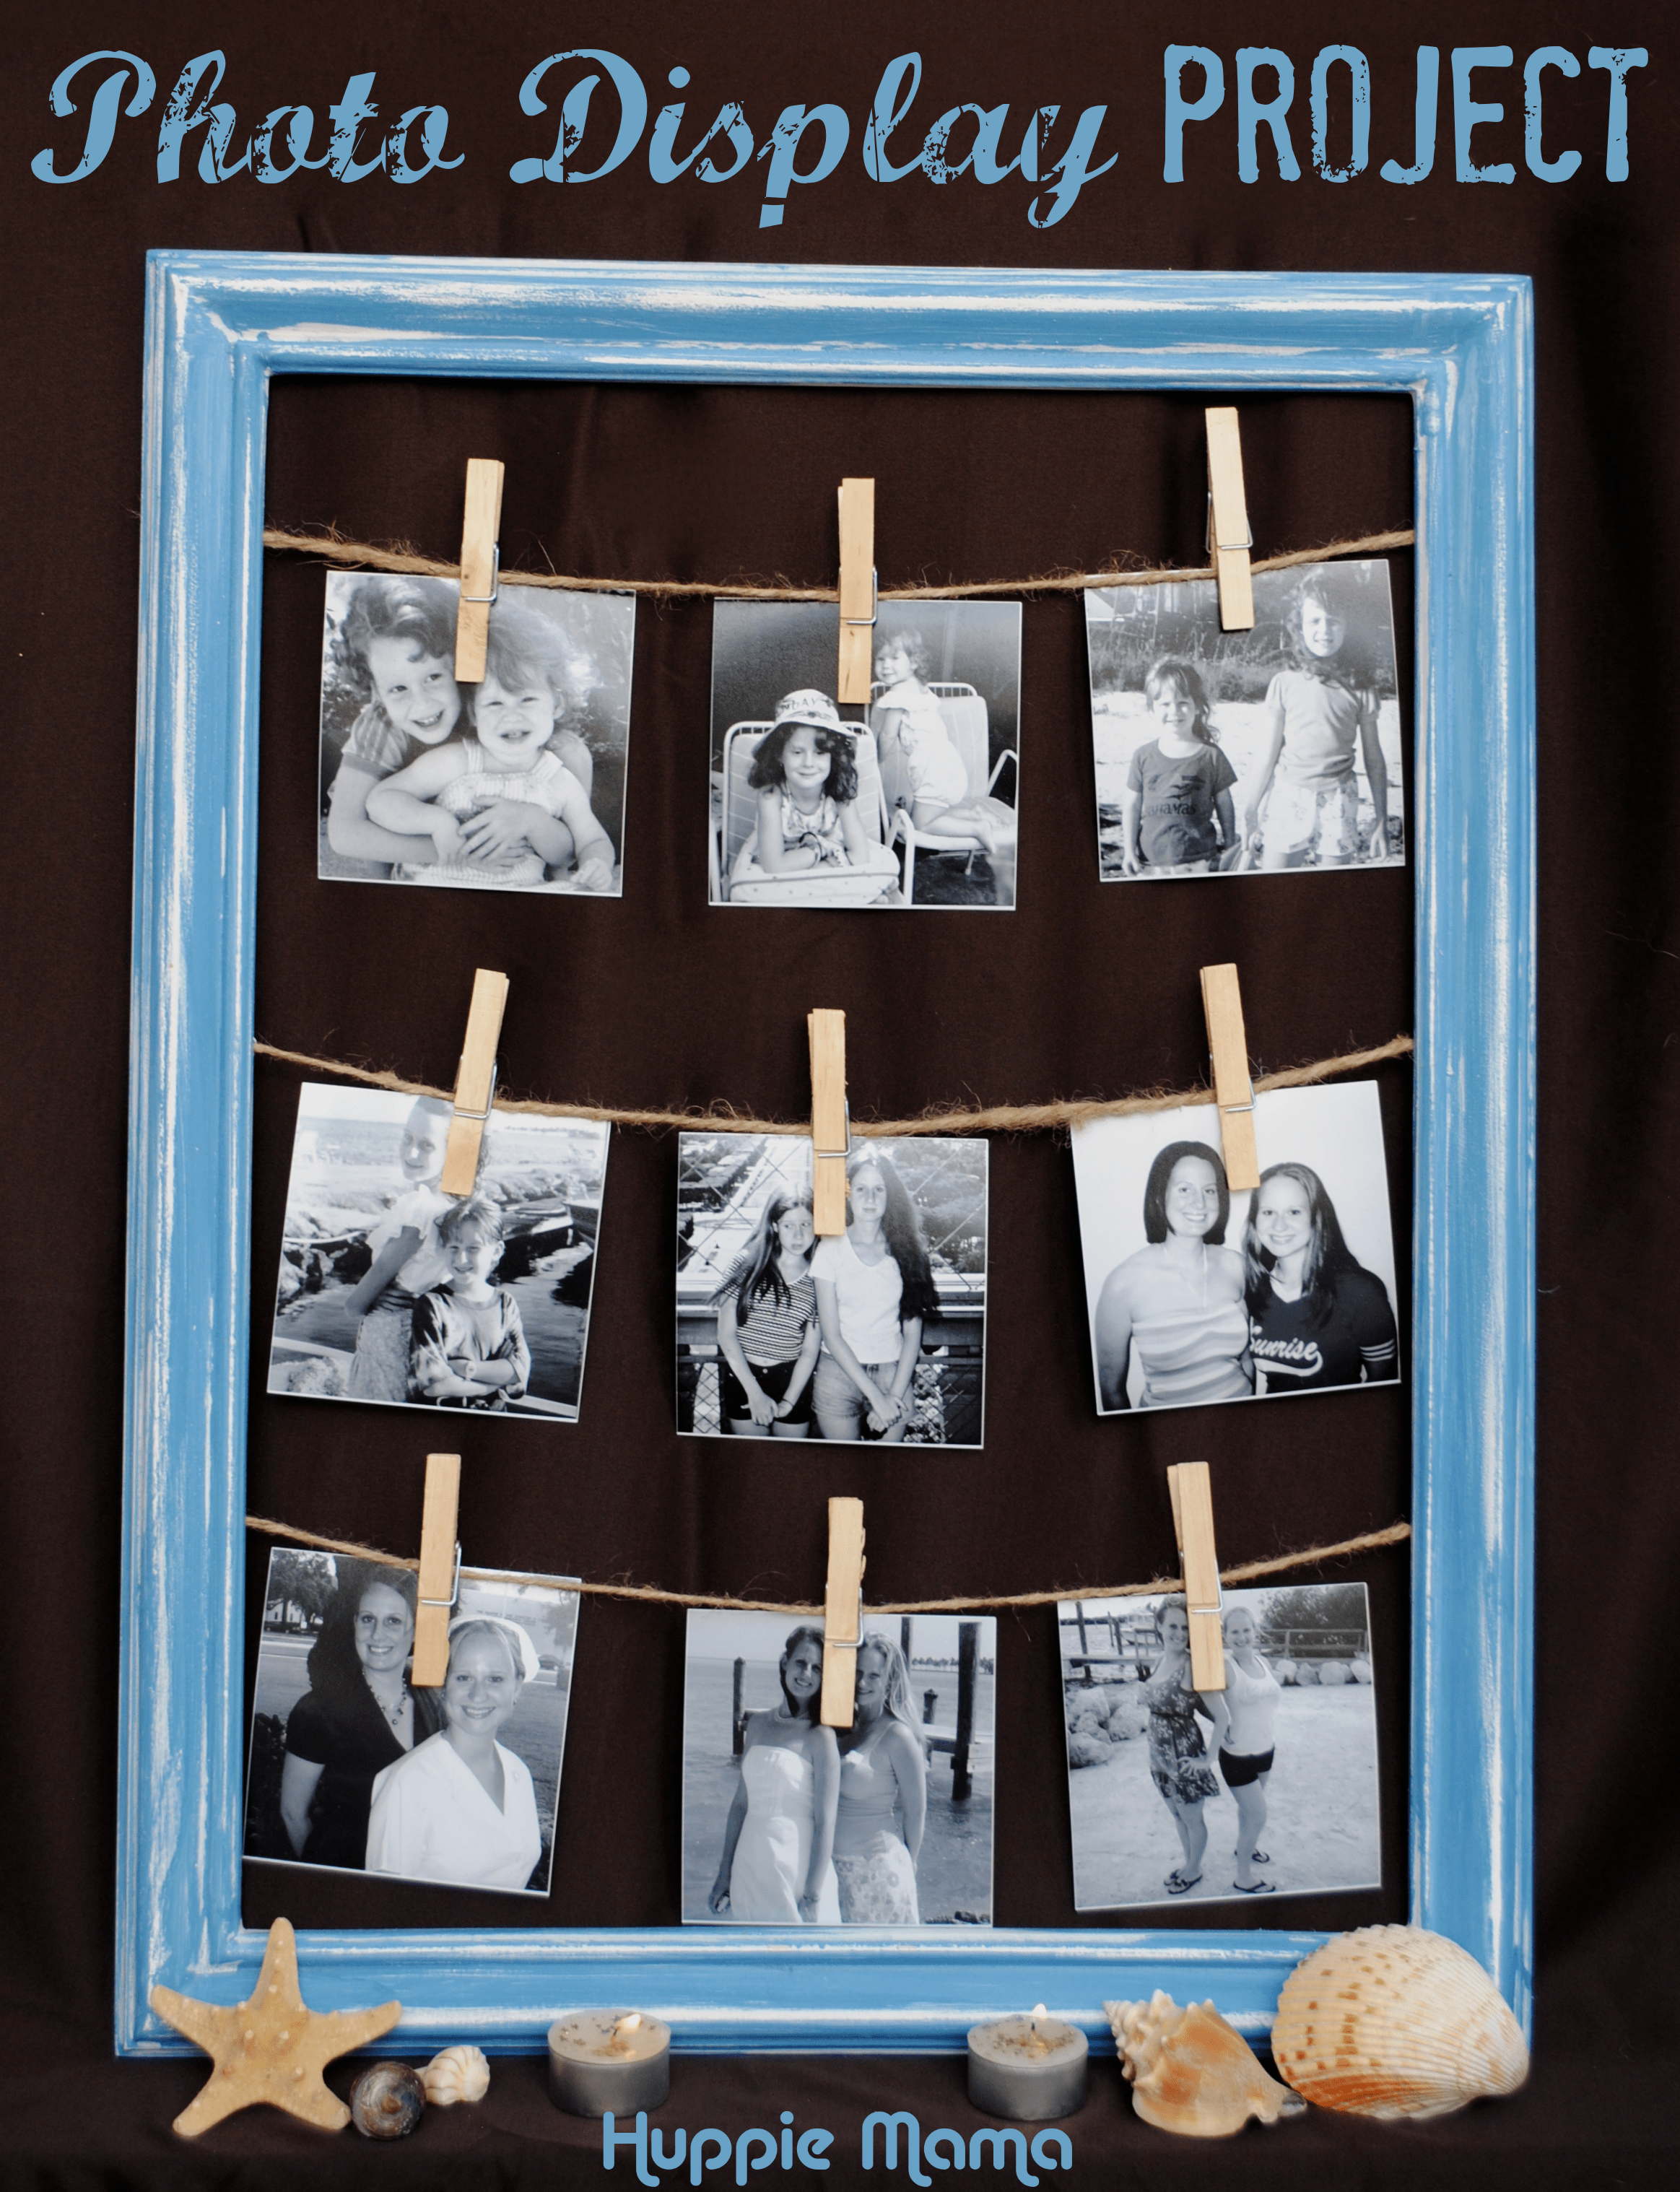
To make this special photography project, I began by gathering some of my favorite Throwback photographs of me and Jamie. I scanned each one, cropped so they were all square, and made them black and white. I uploaded the photos to the Walmart Photo Center to make 4″ x 4″ prints in just an hour.

While I was at Walmart, I visited the greeting card aisle. Hallmark Value Cards are just 47c and 97c and are perfect for any occasion! You can earn a reward for every 5 Hallmark cards you buy at Walmart.

I printed off a few extra pictures, so I included those with my Hallmark “Just Thinking of You” card. You don’t have to wait for a holiday to celebrate the special people in your life!

Next, I purchased my supplies for the photo project at my local hardware store. My sister’s place is beach-themed, so I tried to stick with that look for the project. Here’s the supply list:
- Large frame (mine is 18″ x 24″)
- Wall paint, one light color & one dark color
- Jute twine
- Paintbrush
- Fine sandpaper
- Thumb tacks
- Clothes pins
- Scissors

Begin by painting your frame with the first paint color. Allow that to dry and do a second coat of the contrasting paint color. I used the lighter color on the bottom, darker on top, but you could easily do the reverse order.

When the paint is completely dry, take your sandpaper (I used a sanding block), and gently sand around the frame until the bottom color starts to show through. This gives it an aged, weathered look.

Next, cut the twine to a little longer than the width of your frame (I held mine vertically, but you could do this project horizontally as well.) Tie both ends of the twine and place a thumb tack into the back of the frame to position the twine. Pull taut and place another thumb tack on the other side.


Using clothes pins, clip the photographs to the twine. I like the appearance of 4″ x 4″ square-shaped photographs for this project, but you could choose any size/shape you would like.

Thank you #CollectiveBias for encouraging me to print these awesome #TBT pictures with my sister! Sign up for Hallmark Rewards to see great content from other bloggers. Join in the #ConnectingFriends conversation on Twitter!
Nice photographs of the two of you.
Thank you!
Awesome post, Huppie! 🙂
Thanks – It was so much fun to write/photograph!
This was such a creative idea! I bet she loved the card and photos. Thanks for sharing. #client